Securing images may be necessary in an OSINT investigation. In this short tip we explain how you can easily take a screenshot in the Mozilla Firefox web browser. Without the need for a tool or plugin.
Take a screenshot in Mozilla Firefox
Step 1: download the Mozilla Firefox web browser.

Step 2: go to the website of which you want to save a part. In our example we use our digital learning environment.

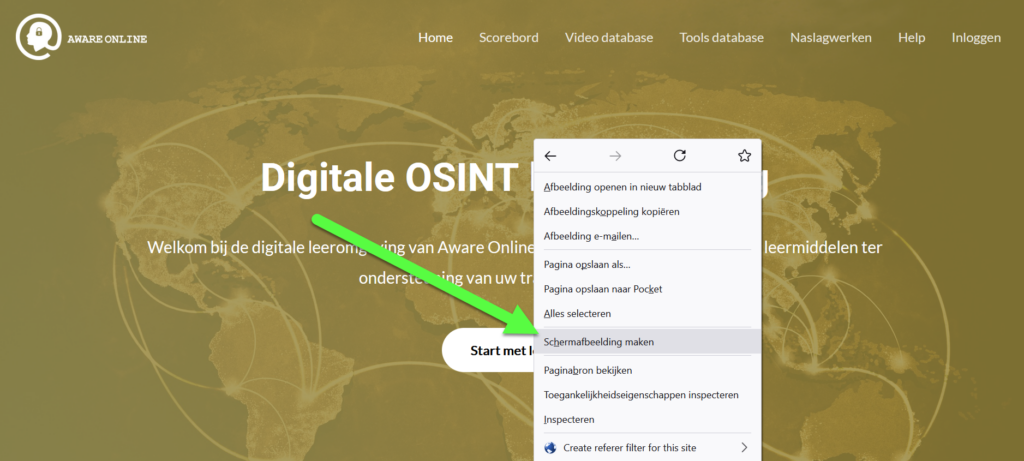
Step 3: right click and select “Take Screenshot” to take a screenshot.
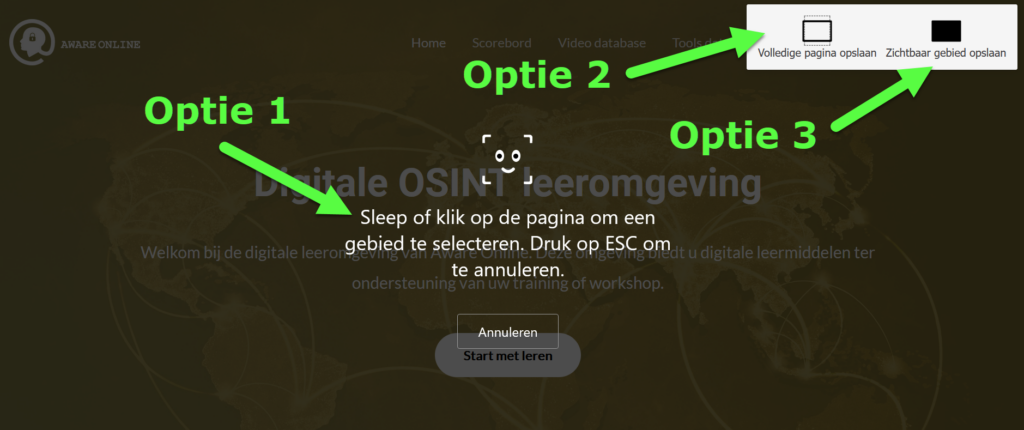
Step 4: you now have three choices First of all, you can move the mouse over the page and select a specific area. The area you select will be saved as a screenshot. The second option is to save the entire page and the last option only the visible area.
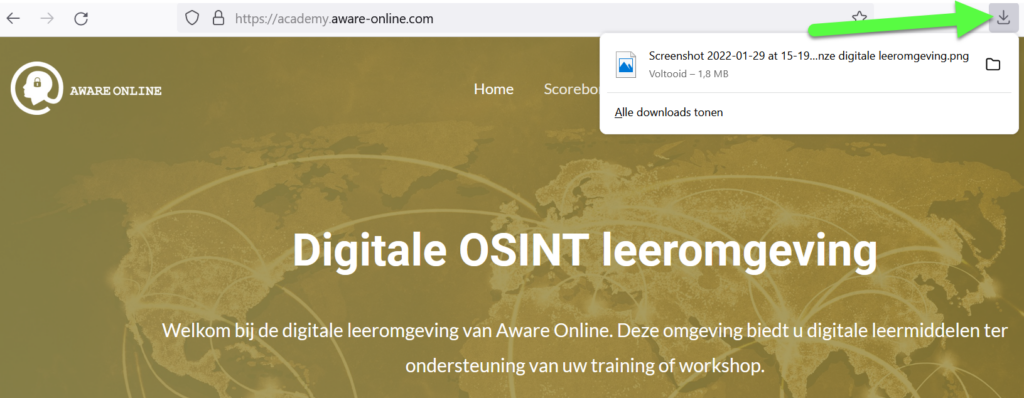
Step 5: click the “Download” button to save the screenshot.
Step 6: once the screenshot has been saved, you can find it via the Downloads button at the top of your web browser.
More information?
Would you like to know more about securing images on websites and social media? Please feel free to contact us or sign up for one of our OSINT courses. We are happy to tell you more!


It might be useful to add that your first option actually has two variants: either drag the cursor to select a region (and after releasing your mouse button you can even adjust the region before finally saving the screenshot), or hover over the page to let Firefox show you several (HTML-)elements of the page that you can capture. In this variant you just need to click on the selected element of your choice. Although here again you can still adjust the selected region before you decide to save it.
The latter option is rather dependent on the actual HTML-structure of the webpage. But it can come in quite handy when you have to take similar screenshots of specific parts of a page and you need these screenshots to be consistent in width or height, or if you want to select them very quickly without without having to drag your cursor each time.